The Ultimate Guide to 24 Colors Paint Pens Acrylic Markers: Transform Your Art Projects
Are you looking to elevate your artistic endeavors with versatile, vibrant tools that work on virtually any surface? Acrylic paint pens have revolutionized the way artists, crafters, and DIY enthusiasts approach their projects. In this comprehensive guide, we’ll explore everything you need to know about 24 Colors Paint Pens Acrylic Markers – from their unique features and benefits to practical applications and expert techniques that will help you maximize their potential.
Whether you’re a seasoned artist or just beginning your creative journey, these multi-functional markers provide endless possibilities for self-expression across various mediums. With their convenient design, precision tips, and brilliant pigmentation, acrylic paint pens combine the vibrant color payoff of traditional acrylic paint with the control and ease of a marker – truly offering the best of both worlds.
What Makes 24 Colors Acrylic Paint Markers Special?
Unlike traditional markers that use alcohol or water-based ink, acrylic paint markers contain genuine acrylic paint – the same professional-grade medium beloved by artists for its durability, opacity, and versatility. This distinctive composition gives these markers several advantages over conventional art supplies:
- Superior Coverage: The highly pigmented acrylic formula provides excellent opacity that covers even dark surfaces efficiently.
- Incredible Versatility: These markers work on almost any surface – paper, canvas, wood, glass, ceramic, metal, plastic, rocks, and fabric – making them truly multi-purpose tools.
- Weather Resistance: Once dry, the acrylic paint creates a waterproof, fade-resistant finish that withstands the elements, making your creations last longer.
- Quick-Drying: The paint dries relatively quickly, allowing for faster project completion and reducing smudging risks.
- Blendability: While they dry permanent, you can blend colors while still wet for creating gradients and mixed hues.
A 24-color set gives you a comprehensive palette to work with, covering the spectrum from primary colors to rich neutrals and metallics. This range allows for endless color combinations while maintaining a portable, organized collection that won’t overwhelm beginners.
Innovative Dual-Tip Design: Precision and Versatility in One Tool
One of the most impressive features of premium acrylic paint pens is their dual-tip design. Leading brands like Magicfly and Artistro have revolutionized these markers by incorporating multiple nibs in one pen, essentially giving you several tools in a single package. This thoughtful engineering addresses a common artist dilemma – the need for both detailed work and broader coverage without switching tools constantly.
The Magicfly acrylic paint pens, for example, feature three distinct nib types: a 0.7mm fine tip for intricate details and thin lines, a 2mm round tip for medium coverage and consistent line work, and a 3mm chisel tip for broader strokes and filling larger areas. This versatility allows you to tackle various aspects of your project without changing tools, streamlining your creative process and ensuring consistency in color application.
Similarly, Artistro’s dual-tip design includes a 1mm fine tip for precision work alongside a 1-5mm dot tip that’s perfect for bold points and filling larger spaces. The reversible nature of these tips means you’re effectively getting two markers in one, offering exceptional value while reducing clutter in your art supplies.
This multi-functionality is particularly valuable when working on detailed projects like mandala art, intricate lettering, or mixed media pieces where varying line weights add visual interest and dimension. The ability to switch between tips allows you to create diverse mark-making effects within the same artwork, from hair-thin lines to bold, expressive strokes – all while maintaining color consistency.
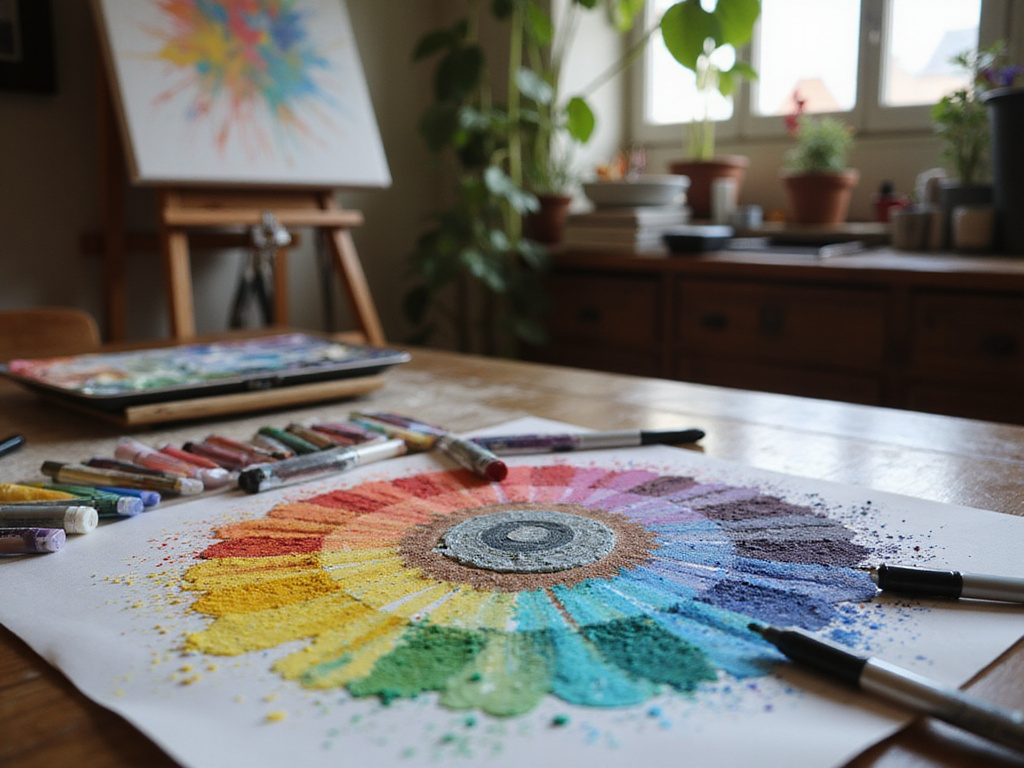
Vibrant Color Selection: A Rainbow at Your Fingertips
The hallmark of a quality 24 Colors Paint Pens Acrylic Markers set is its carefully curated color palette. These collections typically include a balanced spectrum of shades designed to meet a wide variety of creative needs. Here’s what you can typically expect in a comprehensive 24-color set:
- Primary Colors: Rich, saturated red, blue, and yellow that serve as the foundation for color mixing
- Secondary Colors: Vibrant purple, orange, and green created through perfect primary color blending
- Earth Tones: Warm browns, tans, and ochres for natural subjects and grounding elements
- Neutrals: Essential black and white for creating contrast, outlines, and highlights, plus various grays
- Pastels: Soft, light hues perfect for subtle effects and backgrounds
- Metallics: Eye-catching gold, silver, and bronze options for adding shimmer and special effects
The pigments used in premium acrylic paint markers are typically highly concentrated, resulting in colors that maintain their vibrancy even after drying. This is particularly important when working on porous surfaces like wood or fabric, where lesser-quality markers might appear dull or faded after application.
What sets professional-grade markers apart is their color consistency and opacity. Even lighter colors like yellow or pink can provide solid coverage over darker backgrounds – a capability that’s rare in conventional markers. This opacity gives artists greater freedom to work on colored substrates without worrying about color distortion.
Additionally, many manufacturers formulate their acrylic paint markers with lightfast pigments, meaning the colors resist fading when exposed to sunlight over time. This feature is crucial for artwork intended for display or outdoor projects that will face environmental exposure.
Versatile Applications: Endless Creative Possibilities
The true value of 24 Colors Paint Pens Acrylic Markers lies in their remarkable versatility across different applications. These multi-talented tools can transform virtually any surface into a canvas for your imagination. Let’s explore some of the most popular applications:
Rock Painting and Stone Art
Rock painting has emerged as a beloved hobby for artists of all ages, and acrylic paint pens are the perfect tool for this medium. The fine tips allow for intricate details on small stones, while the broader nibs can cover larger areas efficiently. The paint adheres beautifully to the porous surface of rocks, and once sealed with a clear finish, these creations can withstand outdoor conditions, making them perfect for garden decorations or community rock-hiding projects.
Glass and Ceramic Decoration
Transform ordinary glassware, ceramic mugs, or plates into personalized masterpieces with acrylic paint markers. The precision tips make it easy to create detailed designs, monograms, or patterns on these smooth surfaces. Many brands offer formulations that become dishwasher-safe after proper curing (usually through baking in a home oven), allowing you to create functional art that stands up to regular use. This makes them perfect for creating personalized gifts or custom home decor.
Wood Crafts and Furniture Upcycling
From rustic signs to rejuvenated furniture pieces, acrylic paint markers excel on wooden surfaces. The paint penetrates the wood grain beautifully while still allowing natural texture to show through if desired. The markers’ precision makes them ideal for adding text, borders, or intricate patterns to wooden items without the mess and setup traditional paintbrushes require. They’re particularly useful for adding finishing touches to larger painted projects or creating complete designs on smaller wooden crafts.
Paper Crafts and Scrapbooking
Unlike alcohol markers that can bleed through paper, acrylic paint markers sit beautifully on top of paper surfaces, making them excellent for scrapbooking, card making, and journal decoration. The opaque finish means they can cover up mistakes or add highlights over darker backgrounds – a significant advantage over traditional markers. The quick-drying formula also reduces smudging risks when layering elements in paper crafts.
Fabric and Textile Art
Many acrylic paint markers are formulated to work on fabric, opening up possibilities for customizing clothing, creating tote bags, or designing textile art. After proper heat-setting (typically with an iron), the designs become washable and permanent. The precision tips allow for detailed work that would be difficult to achieve with fabric paints and brushes, while still delivering the same durable finish. This makes them perfect for personalizing everything from denim jackets to canvas shoes.
Holiday and Seasonal Decorations
Acrylic markers excel at creating seasonal décor on various surfaces. From decorating pumpkins for Halloween (without the mess and deterioration of carving) to personalizing Christmas ornaments, these versatile tools make holiday crafting easier and more precise. Their ability to work on non-traditional surfaces like plastic, metal, or glass makes them indispensable for holiday DIY projects.
Comparing Top 24 Colors Acrylic Paint Markers Brands
When selecting your set of acrylic paint markers, several leading brands offer excellent 24-color options, each with unique features and benefits. Here’s a detailed comparison to help you make an informed decision:
Magicfly 24 Colors Acrylic Paint Markers
Magicfly has established a strong reputation in the craft marker market, and their 24-color acrylic paint pen set exemplifies their commitment to quality and versatility. These markers feature a distinctive three-tip design that includes a 0.7mm fine tip, a 2mm round tip, and a 3mm chisel tip – essentially giving you three different tools in one marker.
The paint formula is water-based but permanent once dry, making it safe for children while still delivering professional-quality results. These markers work exceptionally well on rock painting, glass decoration, and paper crafts. Users particularly praise the smooth flow of paint, which rarely clogs or requires excessive pumping to maintain consistent color delivery. The set comes in an organized case for easy storage and transport.
Artistro 24 Colors Acrylic Paint Pens
Artistro’s dual-tip acrylic markers feature both a 1mm fine tip and a 1-5mm dot tip, providing excellent versatility for different applications. The Italian-made paint used in these markers is known for its exceptional opacity and vibrant pigmentation, delivering superior coverage even on dark surfaces.
What sets Artistro apart is their specialized formulation that works particularly well on fabric projects. After proper heat-setting, designs created with these markers can withstand machine washing without significant fading or cracking. The set also includes several carefully selected earth tones and neutrals, making it especially suitable for nature-inspired artwork and realistic drawing projects.
Ohuhu 24 Colors Acrylic Markers
Ohuhu offers two distinct varieties of 24-color acrylic markers – their standard tips and their innovative flexible brush tips. The brush tip version provides a unique painting experience that mimics traditional brushwork while maintaining the convenience of a marker format. This feature makes them especially popular among artists transitioning from traditional painting methods.
The Ohuhu formula is particularly noted for its exceptional blendability while wet, allowing for sophisticated color mixing and gradient effects. The colors tend toward the more vibrant end of the spectrum, making them excellent for bold, eye-catching designs. Many users appreciate their quick-drying properties and resistance to smudging, which makes them ideal for layered projects where working on top of previous applications is necessary.
ARRTX 24 Colors Acrylic Paint Markers
ARRTX markers feature a dual tip design with 0.77mm fine points and 3mm bold tips, offering flexibility for various techniques. Their paint formula strikes an excellent balance between flow and opacity, rarely requiring excessive shaking or pumping to maintain consistent color delivery.
These markers are particularly praised for their performance on smooth surfaces like glass and ceramic, with minimal streaking compared to some competitors. The color selection includes several unique shades not commonly found in other sets, making them a good choice for artists looking to expand their color library beyond the standard palette. Their ergonomic barrel design also makes them comfortable for extended use during longer creative sessions.
Essential Techniques for Acrylic Paint Markers
Mastering a few fundamental techniques will help you get the most from your 24 Colors Paint Pens Acrylic Markers. Here’s how to elevate your artwork with these versatile tools:
Proper Activation and Flow Management
Unlike traditional markers, acrylic paint pens require proper activation before first use and sometimes between extended periods of non-use. This process involves gently shaking the pen (with the cap securely fastened) to mix the paint, then pressing the nib down on a test surface repeatedly until the paint flows consistently. This “pumping” action releases paint into the nib without causing flooding.
It’s crucial to perform this activation on a scrap surface – never on your actual project. Some artists keep a designated “activation sheet” solely for this purpose. Once the color flows smoothly and evenly, you’re ready to work on your project. If you notice the color becoming faint during use, a gentle shake (cap on!) and a quick test on your scrap paper should restore proper flow.
Layering and Building Dimension
One of the most powerful techniques with acrylic markers is layering colors to create depth and dimension. Start with base layers of lighter colors, allow them to dry completely (usually just a few minutes), then add darker colors for shadows, details, or outlines. This approach creates a sense of depth that flat coloring cannot achieve.
For even more dimension, consider using the different tips within your marker set strategically. For example, use the broad chisel tip to create solid background areas, the medium round tip for primary elements, and the fine tip for details and highlights. This variation in line weight and texture adds visual interest to your artwork.
Color Blending Techniques
While acrylic paint dries quickly and permanently, you can achieve beautiful blending effects if you work promptly. There are two primary approaches to blending with acrylic markers:
- Wet Blending: Apply two colors side by side while both are still wet, then use a blending tool (like a paint brush, sponge, or even your finger for non-toxic formulas) to gently merge the colors where they meet. This creates a smooth gradient effect.
- Layered Blending: Apply a light base color and allow it to dry partially (just until tacky). Then add your second color, allowing the markers to slightly overlap. The semi-dry base color will interact with the fresh color, creating a natural-looking transition.
For more subtle blending, try the stippling technique – using small dots of different colors placed close together, creating the illusion of blended colors through the principle of optical mixing. This works particularly well with the dot tips found on markers like the Artistro set.
Creating Texture and Special Effects
Acrylic paint markers excel at creating various textures and special effects that add professional quality to your artwork:
- Stippling and Dotting: Create texture through patterns of dots – closer together for darker areas, further apart for lighter areas. This technique works beautifully for creating shadows, suggesting foliage, or depicting textured surfaces.
- Crosshatching: Build depth by layering lines in different directions. The fine tips of acrylic markers make this classic technique particularly effective.
- Sgraffito: Apply a base color, allow it to dry completely, then add a second color on top. While the top layer is still wet, use a toothpick or craft knife to scratch patterns that reveal the color beneath.
- Water Effects: For a watercolor-like effect, apply acrylic marker to your surface, then quickly spritz with water and allow the colors to bleed and spread. This works best on non-porous surfaces where the paint doesn’t immediately absorb.
These techniques take practice to master, but they dramatically expand the creative possibilities of your acrylic markers beyond simple coloring and line work.
Surface Preparation and Finishing Techniques
Proper preparation and finishing are essential for creating durable, professional-looking projects with acrylic paint markers. Different surfaces require specific approaches to ensure the best adhesion, color vibrancy, and longevity:
Preparing Various Surfaces
For optimal results, most surfaces benefit from thorough cleaning before applying acrylic markers:
- Glass and Ceramic: Wash with soapy water, rinse thoroughly, and wipe with rubbing alcohol to remove any oils or residues that might prevent paint adhesion. Ensure the surface is completely dry before painting.
- Wood: Sand the surface lightly to create a smooth base, then wipe away all dust with a tack cloth. For more porous woods, consider applying a thin primer to prevent excessive absorption of the paint.
- Rocks and Stones: Wash with water and mild soap, scrubbing away dirt and debris. Allow to dry completely – preferably for 24 hours, as internal moisture can affect paint adhesion.
- Fabric: Pre-wash without fabric softener to remove manufacturing chemicals. Iron the fabric smooth before painting, and consider using a fabric medium if your markers aren’t specifically formulated for textiles.
- Metal: Clean thoroughly with a degreaser or rubbing alcohol. For previously painted or rusty metal, light sanding may be necessary to create a suitable painting surface.
Sealing and Protecting Your Artwork
While acrylic paint is durable once dry, adding a proper sealant can significantly extend the lifespan of your creations, particularly for items that will be handled regularly or exposed to the elements:
- For Rock Painting: Outdoor-grade clear acrylic sealers in spray form provide excellent protection against rain and sun exposure. Apply 2-3 light coats, allowing drying time between applications.
- For Glass and Ceramics: Heat-setting is often the preferred method. Place your painted item in a cold oven, heat to the temperature specified by your marker manufacturer (typically 300-350°F), bake for 30-60 minutes, then allow to cool in the oven completely. For items that cannot be heat-set, specialized dishwasher-safe sealers are available.
- For Wood Projects: Clear polyurethane or polycrylic sealers offer excellent protection. Choose matte, satin, or glossy finishes depending on your desired final look. Water-based formulations are generally preferable as they’re less likely to yellow over time.
- For Fabric Projects: After the paint has dried for 24 hours, heat-set your design by ironing the reverse side of the fabric for 3-5 minutes on a setting appropriate for the fabric type (no steam). For frequently washed items, a fabric medium mixed with the paint or a fabric sealant can provide additional durability.
Always test your sealing method on a small, inconspicuous area first to ensure compatibility with your specific paint markers. Some sealers may cause certain colors to bleed or fade if they’re not compatible with the paint formulation.
Maintenance and Care for Your Acrylic Paint Markers
With proper maintenance, your investment in 24 Colors Paint Pens Acrylic Markers can provide years of creative enjoyment. Follow these essential care guidelines to maximize the lifespan and performance of your markers:
Proper Storage Practices
How you store your acrylic markers significantly impacts their longevity and performance:
- Always store horizontally: Unlike alcohol markers that should be stored flat, acrylic paint markers benefit from horizontal storage to prevent the paint from pooling at one end.
- Replace caps immediately: Acrylic paint dries quickly when exposed to air, so cap your markers promptly after use to prevent the nibs from drying out.
- Use the original case: Most quality marker sets come in specially designed cases with individual slots. These not only keep your markers organized but also protect them from temperature fluctuations and physical damage.
- Avoid extreme temperatures: Store your markers in a cool, dry place away from direct sunlight. Excessive heat can cause the paint to separate or leak, while freezing temperatures may permanently alter the paint consistency.
Cleaning and Unclogging Tips
Despite your best efforts, acrylic markers sometimes develop clogs or inconsistent flow. Here are effective solutions for these common issues:
- For minor clogs: Shake the marker (with the cap on) and pump the nib on a scrap surface until the flow resumes. Sometimes, simply leaving the marker unopened for 24 hours allows the paint to rehydrate the nib naturally.
- For stubborn clogs: Remove the nib carefully using tweezers if possible (some brands have replaceable nibs designed for this). Soak the nib in warm water for a few minutes, then gently clean with a soft cloth before reinserting.
- For reversible tips: If your markers have dual reversible tips like the Magicfly or Artistro models, remove the tip completely, rinse both ends briefly under warm water, dab dry with a paper towel, then reinsert with the previously unused end facing out.
- Preventative maintenance: Clean your nibs occasionally by drawing on scrap paper until no color appears. This removes dried paint and prevents buildup that can lead to clogging.
For markers that seem permanently dried out, some artists have success with adding a tiny drop of isopropyl alcohol or an acrylic paint thinner to rejuvenate the paint consistency, though this should be considered a last resort as it may alter the paint properties.
Extending Your Marker’s Lifespan
These practical habits will help you get the most value from your acrylic marker investment:
- Use appropriate pressure: Pressing too hard can damage nibs and cause excessive paint flow. Let the marker do the work with light, controlled pressure.
- Clean tips between colors: When switching between colors, especially contrasting ones, scribble on scrap paper until the color runs clean to prevent cross-contamination.
- Rotate usage: Try to use all your markers regularly rather than heavily using just a few favorites. This keeps all the markers in your set properly hydrated and functioning optimally.
- Purchase replacements strategically: Many artists buy duplicates of their most frequently used colors (typically black, white, and primary colors) rather than replacing entire sets when just a few markers are depleted.
With these maintenance practices, a quality set of acrylic paint markers can remain vibrant and functional for years, making them an excellent investment for any creative individual.
Inspiring Project Ideas for Your 24 Colors Paint Pens Acrylic Markers
Now that you understand the capabilities and techniques for using acrylic paint markers, here are inspiring project ideas to put your 24-color set to work:
Home Décor Projects
- Personalized Glassware: Create custom wine glasses with monograms, decorative patterns, or special occasion messaging. Once heat-set, these make thoughtful, personalized gifts.
- Decorative Planters: Transform plain terracotta or ceramic pots with geometric patterns, botanical designs, or colorful mandalas that complement your interior décor.
- Custom Wooden Signs: Create rustic home décor with inspirational quotes, family names, or welcome messages on wooden planks. The precision of acrylic markers makes lettering much easier than traditional painting.
- Stone Trivets: Paint large, flat stones with coordinated patterns to create unique trivets for your dining table. Seal with heat-resistant clear coat for functionality.
- Upcycled Furniture Accents: Add painted details to drawer fronts, chair backs, or cabinet doors to breathe new life into tired furniture pieces without the mess of traditional paint.
Gift and Special Occasion Ideas
- Personalized Memory Stones: Create commemorative stones for special events like weddings, births, or memorials with names, dates, and meaningful symbols.
- Custom Jewelry: Paint wooden beads or polymer clay pieces to create unique, wearable art for customized jewelry making.
- Celebration Plates: Design special “You Are Special Today” plates that can be brought out for birthdays, achievements, and other celebrations. When properly sealed, these become treasured family traditions.
- Growth Chart: Create a personalized height measurement chart on wooden boards for children’s rooms, incorporating their favorite colors and themes.
- Memory Box Decoration: Design keepsake boxes with meaningful imagery and text to store precious memorabilia, photos, or letters.
Seasonal and Holiday Projects
- Painted Pumpkins: Create no-carve pumpkin masterpieces that last throughout the autumn season, from elegant monochromatic designs to elaborate character faces.
- Personalized Ornaments: Transform clear glass or wooden ornaments with custom designs, commemorative dates, or family names for unique holiday decorations.
- Seasonal Window Art: Create removable window decorations on acetate sheets that can be taped to windows for each changing season or holiday.
- Garden Markers: Design durable, weather-resistant plant markers on stones or wooden stakes to identify herbs, vegetables, and flowers in your garden.
- Holiday Table Settings: Paint themed place cards, napkin rings, or centerpiece elements to coordinate with seasonal celebrations and dinner parties.
Educational and Family Projects
- Story Stones: Create sets of painted stones with characters, settings, and objects that children can use as storytelling prompts. This encourages creative thinking and narrative skills.
- Custom Board Games: Design personalized board games on wood or heavy cardstock with family photos, inside jokes, or educational content relevant to your children’s interests.
- Memory Match Games: Paint pairs of matching images on wooden discs to create durable memory games customized to your child’s current interests or learning needs.
- Interactive Growth Charts: Create milestone markers that can be added to a painted growth chart, commemorating special achievements alongside height measurements.
- Family Heritage Projects: Design visual family trees or cultural celebration items that help connect children to their heritage through interactive art.
These project ideas merely scratch the surface of what’s possible with acrylic paint markers. As you become more comfortable with the medium, you’ll likely discover countless creative applications that align with your personal interests and artistic style.
Frequently Asked Questions about 24 Colors Paint Pens Acrylic Markers
How do I properly activate acrylic paint markers before first use?
To activate acrylic paint markers, first shake the pen with the cap on to mix the paint thoroughly. Then, press the nib down repeatedly on a scrap surface (never your actual project) until the paint flows consistently. This pumping action may take 10-20 presses for new markers. If the paint flows too heavily, dab excess on a paper towel until you achieve an even flow. Remember to re-cap immediately after use to prevent drying.
Are acrylic paint markers permanent on all surfaces?
Acrylic paint markers are permanent on most surfaces once fully dry (24-72 hours), but permanence varies by surface type. On porous surfaces like wood, fabric, and paper, they’re highly permanent. On non-porous surfaces like glass, ceramic, and metal, they may require heat-setting (baking at 300-350°F for 30 minutes) or sealing with an appropriate clear coat to achieve maximum durability. For washable items, always follow manufacturer-specific instructions for proper curing and sealing to ensure permanence.
What’s the difference between the various tips included with acrylic paint markers?
Acrylic paint markers come with various tip styles, each serving different purposes: Fine tips (0.7-1mm) excel at detailed work, intricate patterns, and precise lettering. Medium round tips (2-3mm) are versatile for general coloring, consistent lines, and medium-sized details. Chisel tips (3-5mm) create varied line widths depending on angle and are perfect for filling large areas or creating calligraphy effects. Dot tips (1-5mm) create perfect circles for dotting techniques and pointillism. Brush tips, available in some brands like Ohuhu, mimic traditional brushstrokes for a more painterly effect. Many premium markers feature reversible or dual tips, combining two of these options in one pen.
How do I heat-set acrylic paint markers on ceramic and glass?
To heat-set acrylic paint markers on ceramic and glass: First, allow your painted item to air dry completely for at least 24 hours. Place the item in a cold, non-preheated oven on a baking sheet. Set the oven to the temperature specified by your marker manufacturer (typically 300-350°F/149-177°C). Bake for 30-60 minutes, then turn off the oven and allow the item to cool completely inside the closed oven to prevent thermal shock. After heat-setting, wait 72 hours before washing, and even then, hand-washing is recommended for maximum longevity. Always ensure your glass or ceramic item is oven-safe before attempting this process.
Can acrylic paint markers be used on fabric, and will the design be washable?
Yes, acrylic paint markers can be used on fabric with proper preparation and setting. For best results, pre-wash fabric without fabric softener and ensure it’s completely dry and wrinkle-free before painting. After applying your design, allow it to dry completely for at least 24 hours. To make the design washable, heat-set by ironing the reverse side of the fabric (place a cloth between the iron and your project) for 3-5 minutes on a heat setting appropriate for your fabric type, with no steam. Some brands, like Artistro, are specifically formulated for better fabric performance. For frequently washed items, consider adding a fabric medium to the paint or applying a fabric sealant after heat-setting. Always wash painted fabric items inside-out on gentle cycle with mild detergent.
What’s the best way to unclog dried acrylic paint markers?
To unclog dried acrylic paint markers, try these progressive methods: First, shake the marker vigorously with the cap on, then attempt to reactivate it by pumping the nib on scrap paper. If that fails, for removable nibs, carefully extract the nib with tweezers, rinse it under warm (not hot) water, gently clean away dried paint residue, and reinsert. For non-removable nibs, soak just the tip in warm water for 30-60 seconds, then dry and test. In extreme cases, a tiny drop of isopropyl alcohol or acrylic paint thinner dabbed on the nib can help dissolve dried paint, though this may affect paint consistency. For dual-tip markers, try using the opposite end while the problematic tip rehydrates. To prevent future clogs, always cap markers immediately after use and store them horizontally in moderate temperatures.
The world of acrylic paint markers offers endless creative possibilities for artists, crafters, and DIY enthusiasts alike. With their versatility, convenience, and vibrant colors, a quality set of 24 Colors Paint Pens Acrylic Markers represents an excellent investment in your creative toolkit. Whether you’re decorating rocks, personalizing glassware, or creating original artwork, these multi-talented tools simplify the process while delivering professional-quality results.
Looking to explore more acrylic marker techniques? Visit Magicfly’s official acrylic marker page or check out instructional videos on platforms like YouTube for demonstrations from experienced artists.